LogoLogo
  • 👋GETTING STARTED
    • What is AlgoBox™?
    • 2-Week Free Trial
    • System Setup
    • How To Install
    • How To Use GitBook Documentation
    • AlgoBox™ Beginners Course
      • Absolute Basics Curriculum Exam
      • ABC Exam Answers
  • 🔵FUNDAMENTALS
    • 120 Day Program
    • Workspaces
    • Chart Layouts
    • AlgoBars
    • Contract Rollover
    • Trading Sessions
    • Time Regions
    • News
    • Trade Tracker
    • Daily Tracker Sheet
    • Tide / Wave Visualizer
    • Position Sizing
    • Position Manager
    • Position Details
    • Button Panel
    • Bid Ask Lines
    • Channel Regulator
    • Chart Labeler
    • Chart Notes
    • Current Day OHL
    • Golden Ropes
    • MACV Filter Chart
    • MACV ULTIMATE
    • No Fiddle Zone
    • SMLK Timing Lines
    • FibElliDott
    • Harmonic Patterns
    • FlowMaster™ Alpha Omega
    • FlowMaster™ AudioBox
    • FlowMaster™ Cross
    • FlowMaster™ Delta Flagging Pro
    • FlowMaster™ Enigma
    • FlowMaster™ Enigma Bot
    • FlowMaster™ Enigma Dream Panel
    • Info Panel
    • Speedometer & Psychology Module
    • Speedy Chart
    • Support & Resistance Zones
    • Ultimate OBOS Divergence
    • Volume Profiler
  • 🟢STRATEGIES
    • 1 Tick Wonder
    • 2 Finger Salute
    • 3 Wise Men
    • 4 Legged Dog Trap
    • Super Bands
    • Cluster Reversal
    • DCDM
    • DCR
    • Delta King
    • Defense Leg
    • Diamond Dot
    • Double Delta
    • Double Delta Shift Reversal
    • Double Dot
    • HarmoniDot
    • Headshot
    • Ignition Bar
    • J-Hook
    • Masher
    • Enigma + AudioBox
    • Enigma MoonShot
    • Enigma Cadence
    • Double Enigma
    • Enigma + DCDM
    • Piercer
    • Plover
    • PRZ Cross
    • P-PRZ Ladders
    • Regions
    • Richie
    • Shark Back & Shark Tail
    • Strategy Confluence
    • Turtle
    • Alpha Omega Clustering
    • Alpha Omega Continuation
    • Super Alpha Omega
    • Super Moon
    • Titanic Zone
  • 🔴ESSENTIAL TIPS & TECHNIQUES
    • 4 Types of Stop Losses
    • 2-Try Rule
    • Recency Is Key
    • Hold To Opposing Signal
    • Small Account Challenge
    • Practice 10x Size
    • Checklists & Reminders
    • Stalking Trades
    • Dr. Seuss Entry Technique
    • Windfall Rules
    • Tools Of The Trade
    • Screenshots & Recordings
    • Trade Copier
    • PC Performance
    • NinjaTrader 8
    • Hotkeys
    • Sound
    • Trade Performance
    • Indicators
    • Market Replay / NT Playback
    • Commissions
    • Daily Loss Limit
    • Multiple PCs
    • Discord
    • AlgoBox™ Academy
      • AlgoBox™ Academy Exam Answers
    • Discounts
  • 🔗Links
    • Website
    • YouTube
    • Discord
    • AlgoBoxGPT
    • ℹ️Disclaimer
Powered by GitBook
On this page
  • How To Highlight A Region
  • Break Of Region
  • Region Breakout With Executed Trades
  • More Examples Of Region Breakouts
  • Video Tutorial: Region Highlight
Export as PDF
  1. STRATEGIES

Regions

Last updated 14 days ago

Region highlighting visually emphasizes areas where the price is ranging or in an accumulation zone.

By drawing a region around these zones, you can more easily identify potential breakouts. Once the price breaks out of the highlighted region, you can potentially enter trades using confluence from various strategies like the , , , , and more.

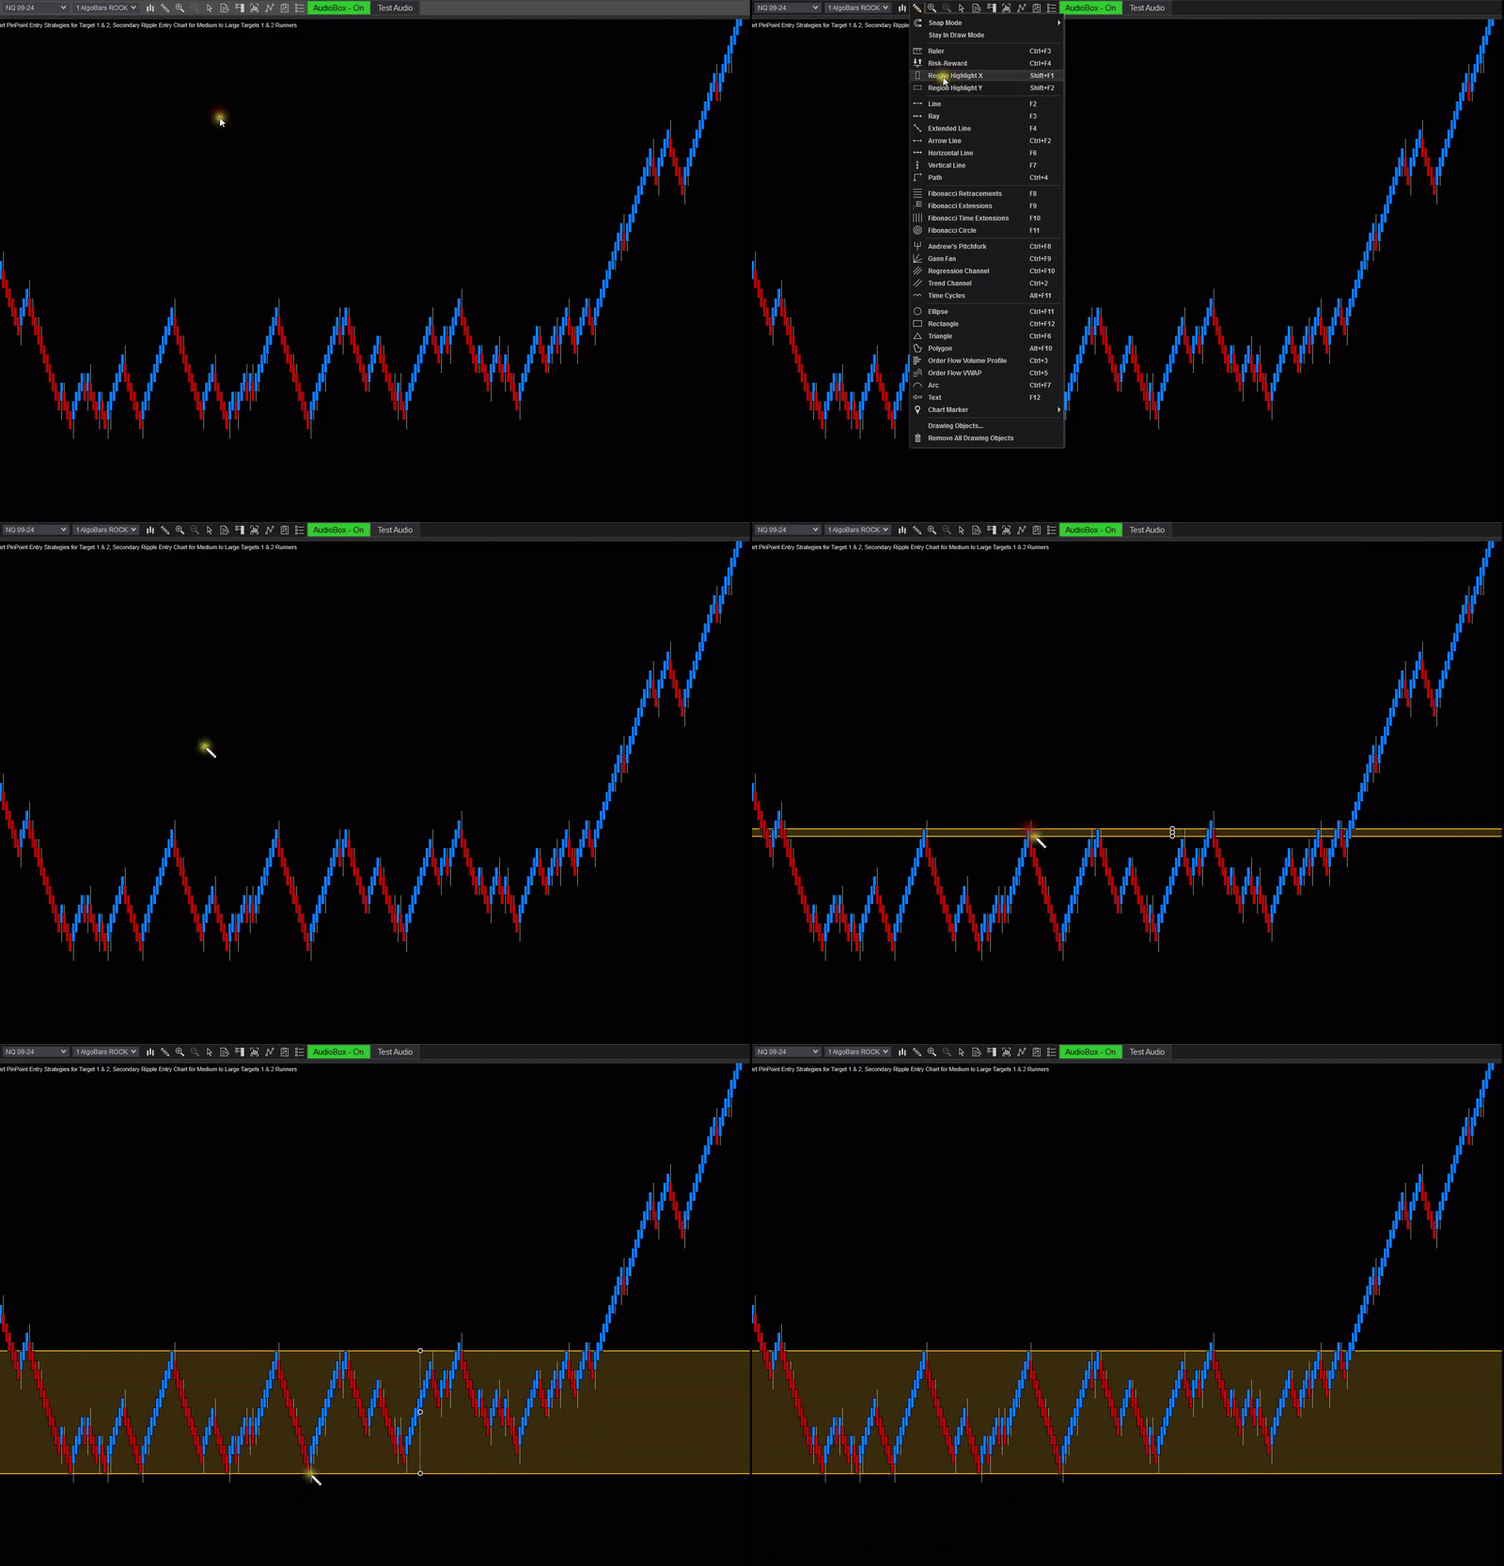
How To Highlight A Region

Break Of Region

When a highlighted region is broken, it often indicates a strong move in that direction.

Region Breakout With Executed Trades

After a region breakout, it is advisable to place an order only if a signal or strategy is present with additional confluence across multiple charts.

More Examples Of Region Breakouts


Video Tutorial: Region Highlight


- No credit card required, no obligation, no gimmicks.

🟢
Try AlgoBox™ for free
Disclaimer
FlowMaster™ Enigma
DCDM
PRZ Cross
FibElliDott
The highlighted region marks an accumulation or price-ranging zone, awaiting a breakout in either direction.
WATCH: How to select the Region Highlight Tool to highlight a specific region on the chart.
Here is an example where the region has broken to the upside, and the price continues to move higher.
Here is another example where the region has broken to the downside, and the price continues to move lower.
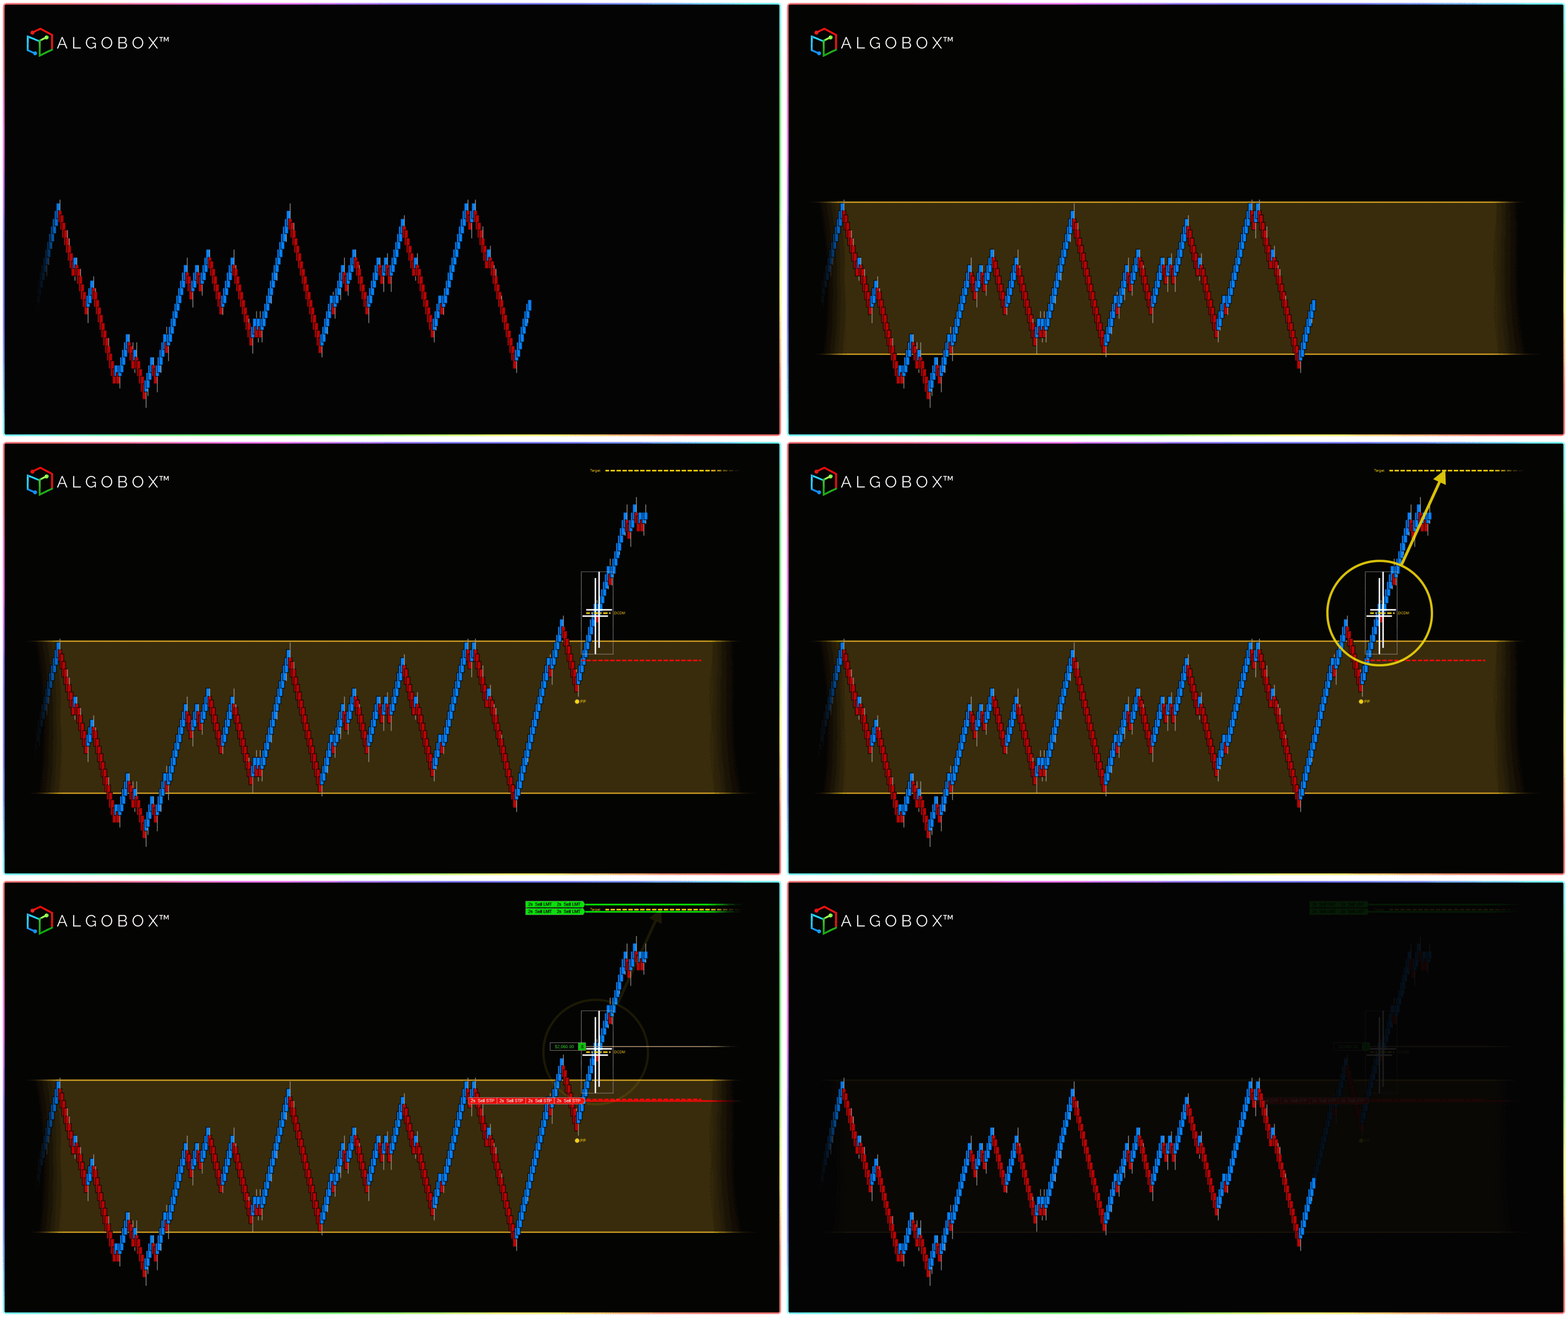
Here is an example where the price breaks out of a highlighted region, followed by a DCDM indicating a potential upward move. Stops and targets are set according to the DCDM recommendations for better risk to reward,
Here is another example where the price breaks out of a highlighted region, followed by a DCDM indicating a potential downward move.Stops and targets are set according to the DCDM recommendations for better risk to reward,
Here is an example where a green Enigma has been plotted shortly after the price broke out of the region, indicating a potential for long positions.
Here is another example where a red Enigma has been plotted shortly after the price broke out of the region, indicating a potential for short positions.
WATCH: Vinny E. Mini shows how to use the region highlight tool in this compilation video.