LogoLogo
  • 👋GETTING STARTED
    • What is AlgoBox™?
    • 2-Week Free Trial
    • System Setup
    • How To Install
    • How To Use GitBook Documentation
    • AlgoBox™ Beginners Course
  • 🔵FUNDAMENTALS
    • 120 Day Program
    • Workspaces
    • Chart Layouts
    • AlgoBars
    • Contract Rollover
    • Trading Sessions
    • Time Regions
    • News
    • Trade Tracker
    • Daily Tracker Sheet
    • Tide / Wave Visualizer
    • Position Sizing
    • Position Manager
    • Position Details
    • Button Panel
    • Bid Ask Lines
    • Channel Regulator
    • Chart Labeler
    • Current Day OHL
    • Golden Ropes
    • MACV Filter Chart
    • MACV ULTIMATE
    • No Fiddle Zone
    • SMLK Timing Lines
    • FibElliDott
    • Harmonic Patterns
    • FlowMaster™ Alpha Omega
    • FlowMaster™ AudioBox
    • FlowMaster™ Cross
    • FlowMaster™ Delta Flagging Pro
    • FlowMaster™ Enigma
    • FlowMaster™ Enigma Bot
    • FlowMaster™ Enigma Dream Panel
    • Info Panel
    • Speedometer & Psychology Module
    • Speedy Chart
    • Support & Resistance Zones
    • Ultimate OBOS Divergence
    • Volume Profiler
    • Chart Notes
  • 🟢STRATEGIES
    • 1 Tick Wonder
    • 2 Finger Salute
    • 3 Wise Men
    • 4 Legged Dog Trap
    • Super Bands
    • Cluster Reversal
    • DCDM
    • DCR
    • Delta King
    • Diamond Dot
    • Double Delta
    • Double Delta Shift Reversal
    • Double Dot
    • HarmoniDot
    • Headshot
    • Ignition Bar
    • J-Hook
    • Masher
    • Enigma + AudioBox
    • Enigma MoonShot
    • Enigma Cadence
    • Double Enigma
    • Enigma + DCDM
    • Piercer
    • Plover
    • PRZ Cross
    • P-PRZ Ladders
    • Richie
    • Shark Back & Shark Tail
    • Strategy Confluence
    • Turtle
    • Regions
    • Alpha Omega Clustering
    • Alpha Omega Continuation
    • Super Alpha Omega
    • Super Moon
    • Titanic Zone
  • 🔴ESSENTIAL TIPS & TECHNIQUES
    • 4 Types of Stop Losses
    • 2-Try Rule
    • Recency Is Key
    • Hold To Opposing Signal
    • Small Account Challenge
    • Practice 10x Size
    • Checklists & Reminders
    • Stalking Trades
    • Dr. Seuss Entry Technique
    • Windfall Rules
    • Tools Of The Trade
    • Screenshots & Recordings
    • Trade Copier
    • PC Performance
    • NinjaTrader 8
    • Hotkeys
    • Sound
    • Trade Performance
    • Indicators
    • Market Replay / NT Playback
    • Commissions
    • Daily Loss Limit
    • Multiple PCs
    • Discord
    • AlgoBox™ Academy
      • Answers
    • Discounts
  • 🔗Links
    • Website
    • YouTube
    • Discord
    • AlgoBoxGPT
    • ℹ️Disclaimer
Powered by GitBook
On this page
  • No Fiddle Zone Examples
  • MACV Chart No Fiddle Zone
  • Days of Data To Load
  • No Fiddle Zone Settings
  • 1. Audio
  • 2. Calculations
  • 3. Visual Settings
  • 4. Data Series
  • 5. Setup
  • 6. Visual
  • Video Tutorial: No Fiddle Zone
Export as PDF
  1. FUNDAMENTALS

No Fiddle Zone

"Don't Fiddle In The Middle" -Vinny E. Mini

Last updated 3 hours ago

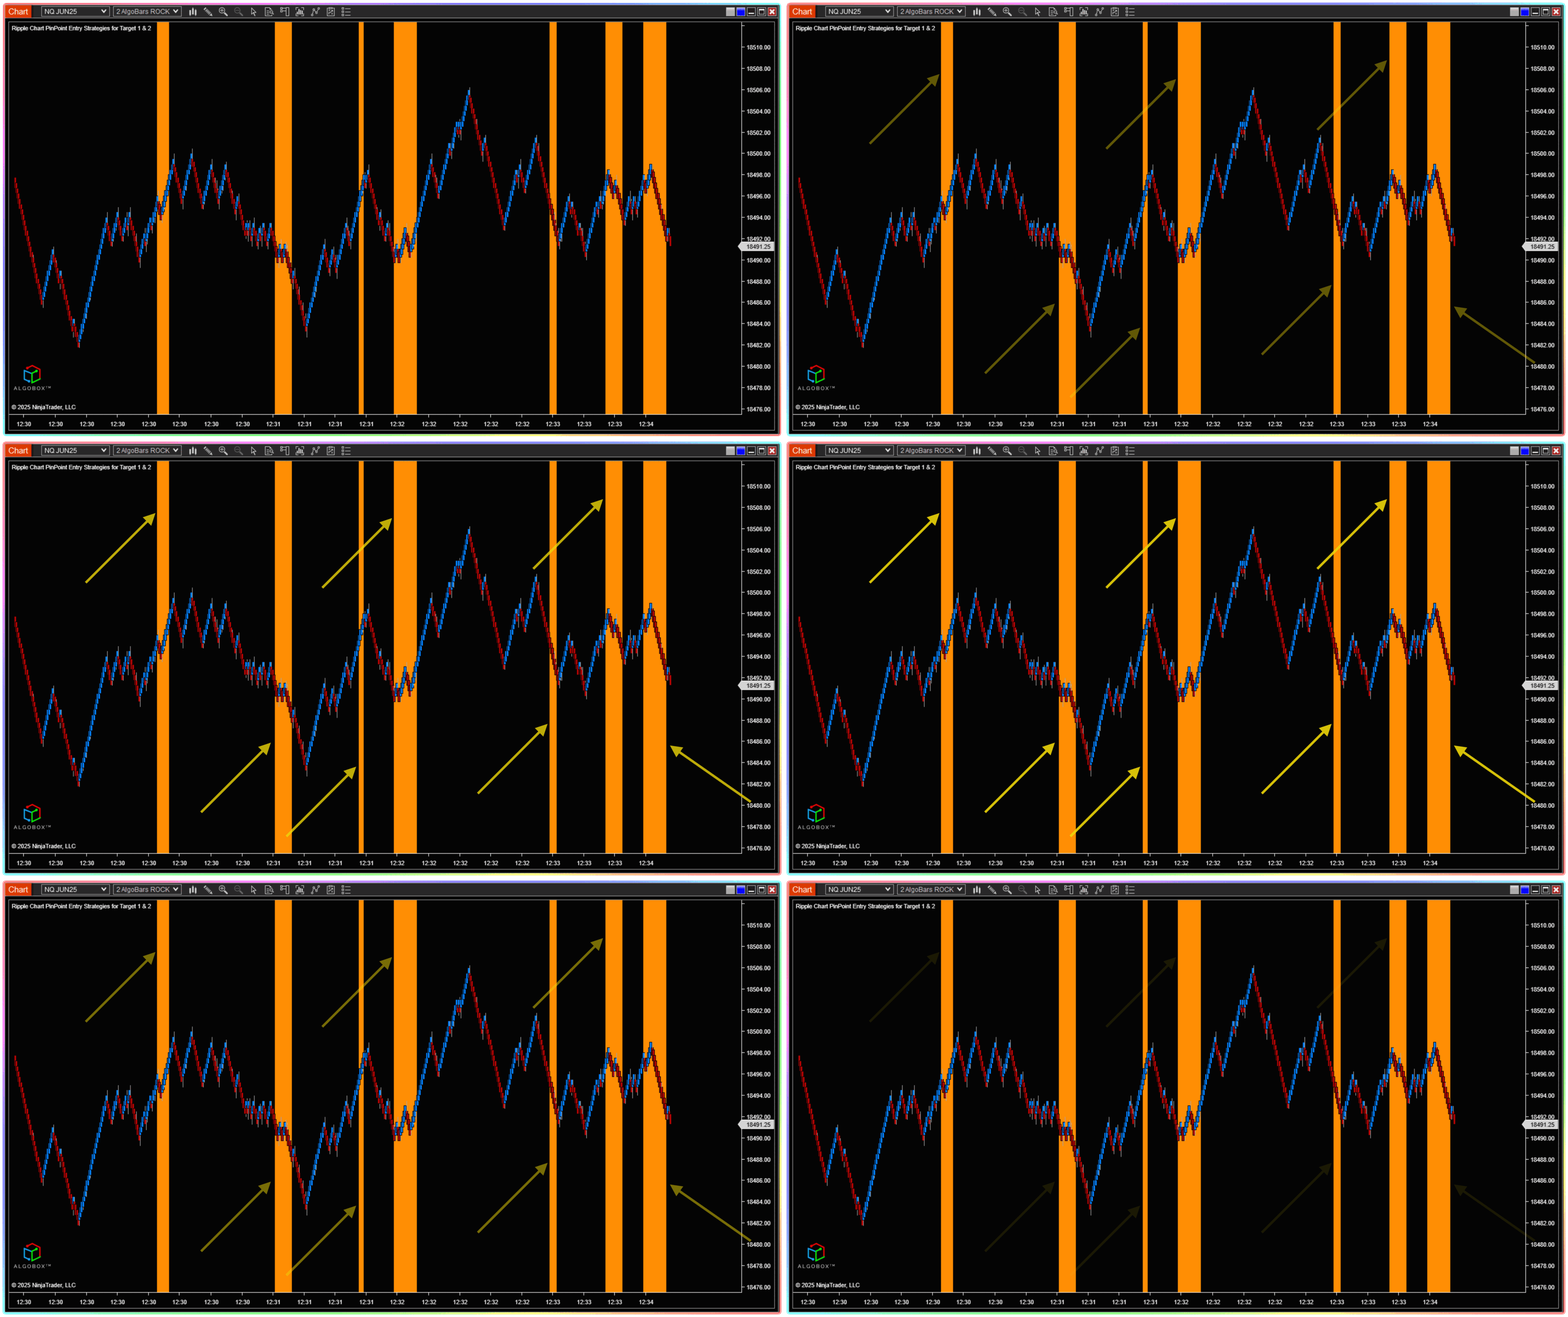
When price is in the No Fiddle Zone on the MACV chart, the AlgoBox™ No Fiddle Zone indicator displays vertical zones on any other chart you configure it to.

The No Fiddle Zone indicator is another feature of AlgoBox™ that helps you with the Order of Operations filtering process to stay out of potential zones of indecision.

The No-Fiddle Zone is optional and its vertical highlight color can be customized to your desire.


No Fiddle Zone Examples


MACV Chart No Fiddle Zone

This is the zone that gets displayed on any other chart that has the No Fiddle Zone indicator configured.

When price is inside the first standard deviation lines above and below the zero line on MACV histogram it is considered to be inside The No Fiddle Zone.

The No-Fiddle Zone highlight and zero line color and opacity can be customized to your desire.

When price is inside the No Fiddle Zone, traders may become more easily trapped and stopped out, as price tends to fluctuate and whipsaw in both directions. This tool turns the MACV chart into an invaluable filtering tool, not only for direction but for a "go or no-go" heuristic.

Heuristics are mental shortcuts that allow people to solve problems and make judgments quickly and efficiently.


Days of Data To Load

If the No Fiddle Zone or MACV histogram isn’t displaying correctly, simply click on the chart and press CTRL+F to open the Data Series window. From there, increase the "Days to Load" setting. The number of days required varies depending on the instrument, the day of the week, recent holidays, and the AlgoBar size for that chart. Adjust as needed until all indicators load fully.


No Fiddle Zone Settings

1. Audio

The audio alerts you once a No Fiddle Zone vertical is plotted on the chart. You can customize these alerts by changing the audio to a preferred voice or sound, or turn them off entirely.

AlgoVoice: You can enable or disable real-time audio alerts as per your preference.

Voice Rate: You can customize the speed of the AlgoVoice alerts to your preference.

2. Calculations

Allows you to control how frequently the No Fiddle Zone indicator recalculates. The Calculation sets the frequency of these calculation cycles. Customization allows for greater control over data update rates.

AlgoBars Size: This setting must match the instrument's MACV Chart AlgoBar size.

Audio Filter: You can enable or disable repeated real-time audio alerts as per your preference. When checked, the audio alert will continue to trigger as long as price is in the same No Fiddle Zone.

Audio Interval (secs): Customize the interval of the audio alert in seconds.

3. Visual Settings

Show Fiddle Zone: Toggle this setting ON or OFF to display or hide the No Fiddle Zone verticals.

Fiddle Zone Color: Allows customization of the Fiddle Zone color to your desire.

Show Zero Zone: Toggle this setting ON or OFF to display or hide the Zero Zone (flat line) verticals.

Zero Zone Color: Allows customization of the Zero Zone (flat line) color to your desire.

Zero Zone Calculation: Allows customization of the Zero Zone to a percentage width of the No Fiddle Zone to your desire.

4. Data Series

Displays the current chart instrument, contract date and configurations applied.

Input Series: This setting determines which chart the indicator is displayed on, linking the indicator to the selected chart data.

5. Setup

Allows you to add a label, set the maximum bars to look back, and configure calculations based On Price Change, On Bar Close, or On Each Tick.

On Price Change: Updates the indicator only when there is a change in the instrument's price.

On Bar Close: Updates whenever a new bar closes, recalculating based on the finalized bar data to reflect the latest market conditions and changes in trends. Be mindful of whether you are using AlgoBars or range bars. This is the default setting for this indicator.

On Each Tick: Updates with every price change or tick in the market, providing real-time adjustments and reflecting the most current data. This setting increases CPU processing load.

6. Visual

Auto Scale: Automatically adjusts the indicator’s scale to fit within the chart’s price axis, ensuring it’s properly visible without manual adjustments.

Displacement: Shifts the indicator's plot forward or backward on the time axis. This setting is useful for aligning the indicator with price bars or other chart elements, especially in cases where you want to visualize future or past data relative to the current price.

Display in Data Box: Determines whether the values are shown in the Data Box, which is an on-screen display that provides detailed information about the current values when you hover over or click on the chart.

Panel: Specifies which panel or sub-panel the indicator is displayed in on the chart. Indicators can be placed in separate panels above or below the main price chart, allowing for organized and uncluttered visualization of multiple indicators.

Price Markers: Controls the display of markers or symbols on the price axis associated with the indicator's values. This setting helps highlight specific price levels or events directly on the price chart for better visibility and analysis.

Scale Justification: Determines where the indicator is positioned on the price scale, such as to the right or left side of the chart.

Visible: Toggles the overall visibility of the indicator, allowing you to hide or show it on the chart as needed.


Video Tutorial: No Fiddle Zone


The with the option "Show Deviations" checked ON will display horizontal standard deviation lines above and below the zero line of the histogram. The first line above and below the zero line is called The No Fiddle Zone. The No Fiddle Zone is a natural evolution of the "Christmas Tree" pattern filtering tactic.

🔵
MACV chart

Only available on AlgoBox™ for NinjaTrader 8.

Try AlgoBox™ for free today.

Disclaimer
WATCH: Vinny E. Mini explains the No Fiddle Zone indicator live on stream at the .
1:01:10 time stamp
The AlgoBox™ No Fiddle Zone indicator helps you stay out of potential chop zones of indecision.
The AlgoBox™ No Fiddle Zone indicator displays vertical zones on any chart its configured to, other than the MACV chart.
WATCH: Compare the MACV histogram (top) and the Ripple B chart (bottom) when the yellow arrows point to the change in states from outside the No Fiddle Zone to inside, and vice versa.
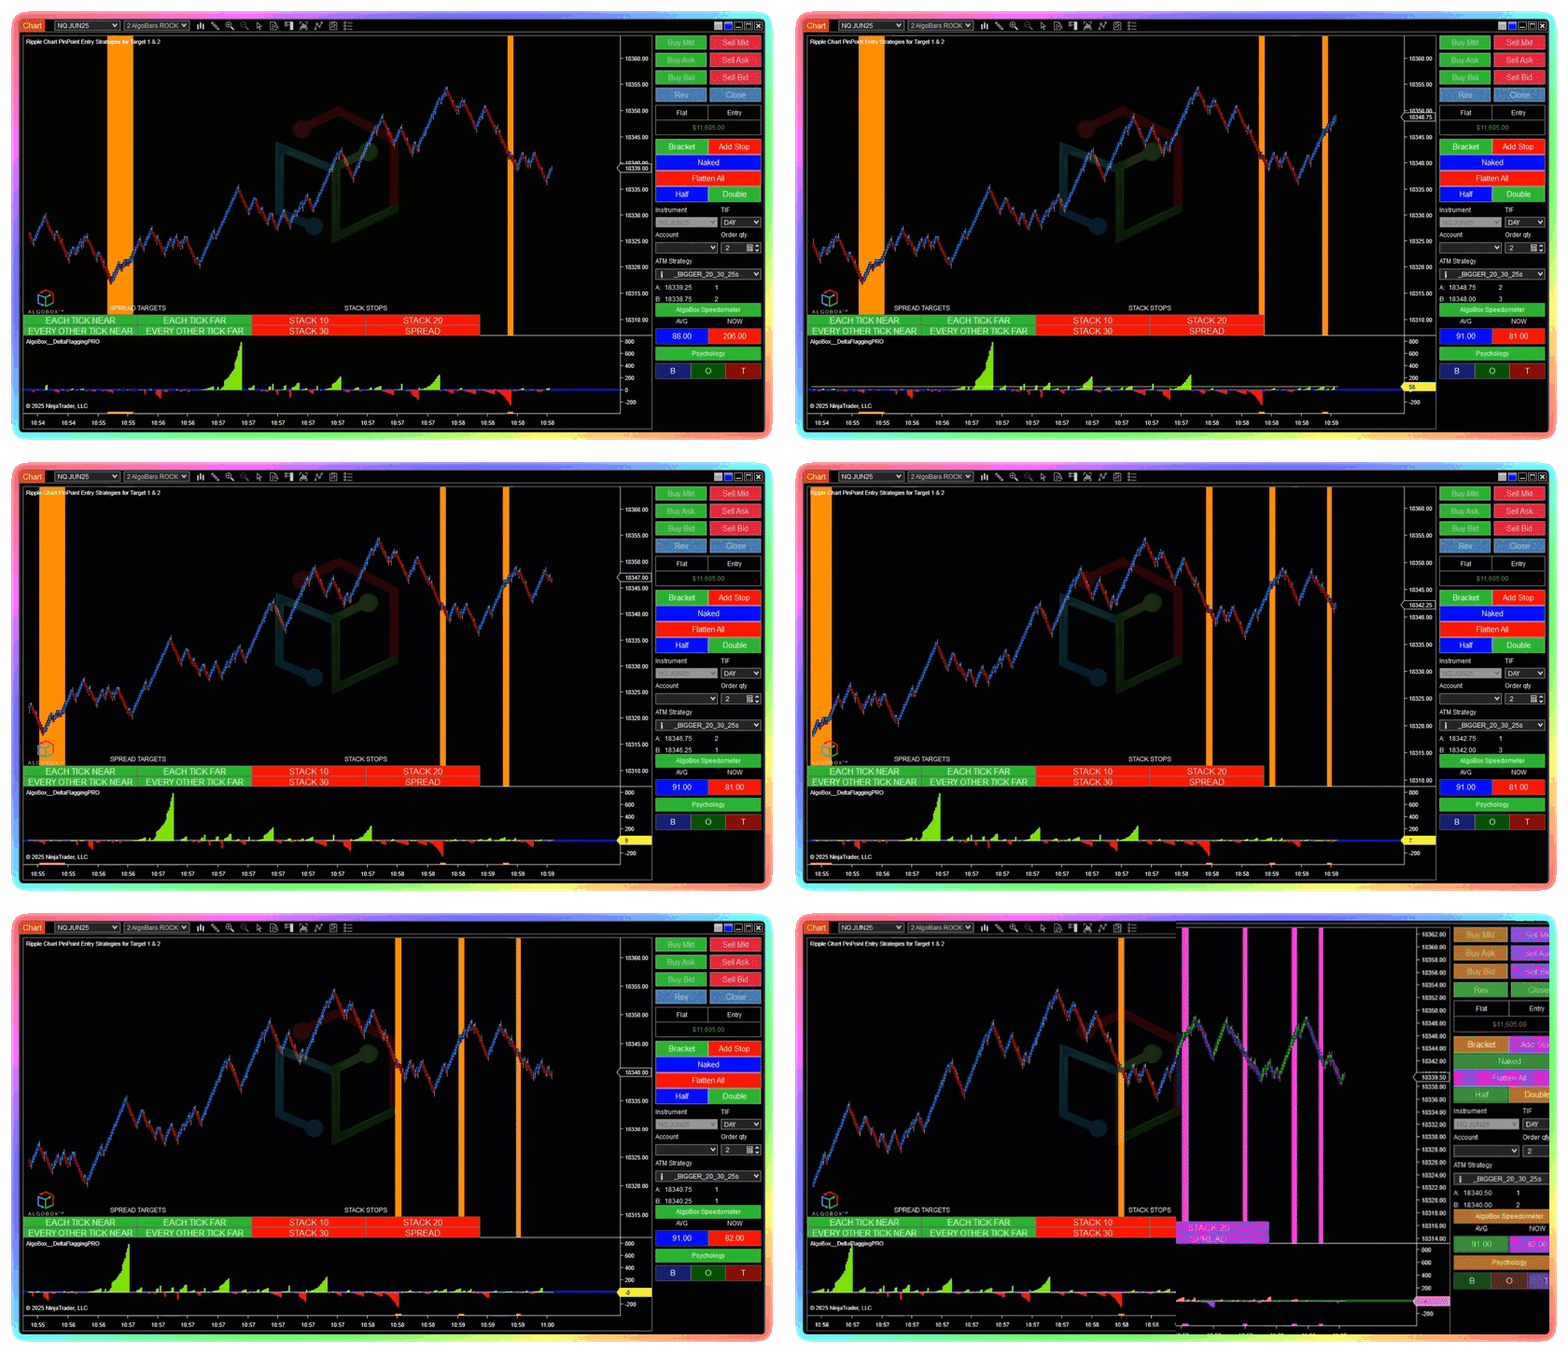
WATCH: The AlgoBox™ No Fiddle Zone indicator in fast action on an NQ chart.
To enable deviation lines which help to identify potential price reversals, navigate to the Vinnys MACV Entry System in the indicator settings. Under the Visual Settings tab, find "Show Deviations" and ensure it is checked.
The highlighted region between the first deviation lines above and below the zero line, is known as "The No-Fiddle Zone." This region is automatically highlighted by the AlgoBox™ software.
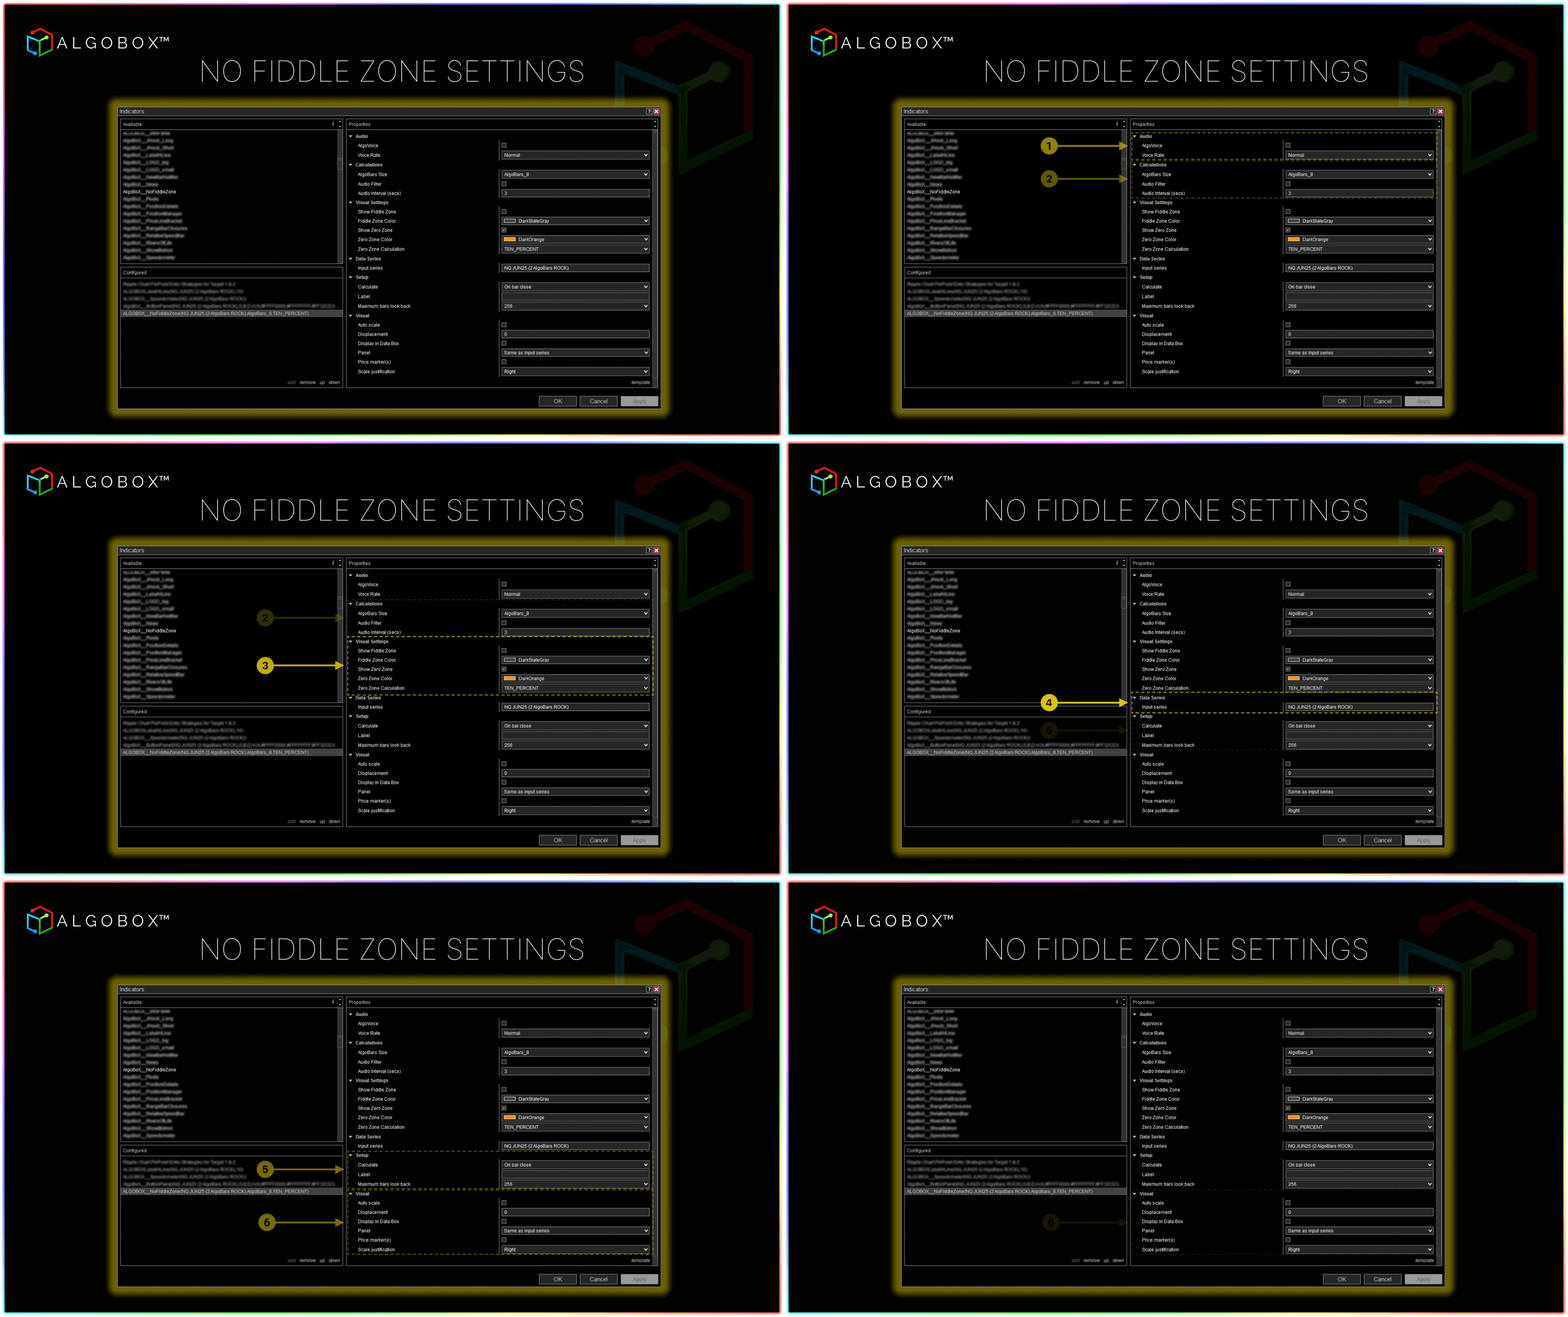
The AlgoBox™ No Fiddle Zone indicator offers a variety of customizable settings, allowing you to adjust them according to your preferences. Default AlgoBox™ settings are shown.
Ripple A