LogoLogo
  • 👋GETTING STARTED
    • What is AlgoBox™?
    • 2-Week Free Trial
    • System Setup
    • How To Install
    • How To Use GitBook Documentation
    • AlgoBox™ Beginners Course
      • Absolute Basics Curriculum Exam
      • ABC Exam Answers
  • 🔵FUNDAMENTALS
    • 120 Day Program
    • 8-Day Boot Camp
    • Workspaces
    • Chart Layouts
    • AlgoBars
    • Trading Sessions
    • Time Regions
    • News
    • Trade Tracker
    • Daily Tracker Sheet
    • Tide / Wave Visualizer
    • Position Sizing
    • Position Manager
    • Position Details
    • Button Panel
    • Bid Ask Lines
    • Channel Regulator
    • Chart Labeler
    • Chart Notes
    • Contract Rollover
    • Current Day OHL
    • Golden Ropes
    • MACV Filter Chart
    • MACV ULTIMATE
    • No Fiddle Zone
    • FibElliDott
    • Harmonic Patterns
    • Favorable Direction
    • FlowMaster™ Alpha Omega
    • FlowMaster™ AudioBox
    • FlowMaster™ Cross
    • FlowMaster™ Delta Flagging Pro
    • FlowMaster™ Enigma
    • FlowMaster™ Enigma Bot
    • FlowMaster™ Enigma Dream Panel
    • Info Panel
    • SMLK Timing Lines
    • Speedometer & Psychology Module
    • Speedy Chart
    • Support & Resistance Zones
    • Ultimate OBOS Divergence
    • Volume Profiler
  • 🟢STRATEGIES
    • 1 Tick Wonder
    • 2 Finger Salute
    • 3 Wise Men
    • 4 Legged Dog Trap
    • Super Bands
    • Cluster Reversal
    • DCDM
    • DCR
    • Delta King
    • Defense Leg
    • Diamond Dott
    • Double Delta
    • Double Delta Shift Reversal
    • Double Dott
    • HarmoniDott
    • Headshot
    • Ignition Bar
    • J-Hook
    • Masher
    • Enigma + AudioBox
    • Enigma MoonShot
    • Enigma Cadence
    • Double Enigma
    • Enigma + DCDM
    • Piercer
    • Plover
    • PRZ Cross
    • P-PRZ Ladders
    • Regions
    • Retail Run
    • Richie
    • Shark Back & Shark Tail
    • Strategy Confluence
    • Turtle
    • Alpha Omega Clustering
    • Alpha Omega Continuation
    • Super Alpha Omega
    • Super Moon
    • Titanic Zone
  • 🔴ESSENTIAL TIPS & TECHNIQUES
    • 4 Types of Stop Losses
    • 2-Try Rule
    • Recency Is Key
    • Hold To Opposing Signal
    • Small Account Challenge
    • Practice 10x Size
    • Checklists & Reminders
    • Stalking Trades
    • Dr. Seuss Entry Technique
    • Windfall Rules
    • Tools Of The Trade
    • Screenshots & Recordings
    • Trade Copier
    • PC Performance
    • NinjaTrader 8
    • Hotkeys
    • Sound
    • Trade Performance
    • Indicators
    • Market Replay / NT Playback
    • Commissions
    • Daily Loss Limit
    • Multiple PCs
    • Discord
    • AlgoBox™ Academy
      • AlgoBox™ Academy Exam Answers
    • Discounts
  • 🔗Links
    • Website HQ
    • YouTube: AlgoBox (Official)
    • YouTube: ALGOBOX Trading
    • Discord
    • AlgoBoxGPT
    • ℹ️Disclaimer
Powered by GitBook
On this page
  • But What If?
  • Example: Double Dott
  • Video Tutorials: Double Dott
Export as PDF
  1. STRATEGIES

Double Dott

Double Confluence 🔵🔵

Last updated 17 hours ago

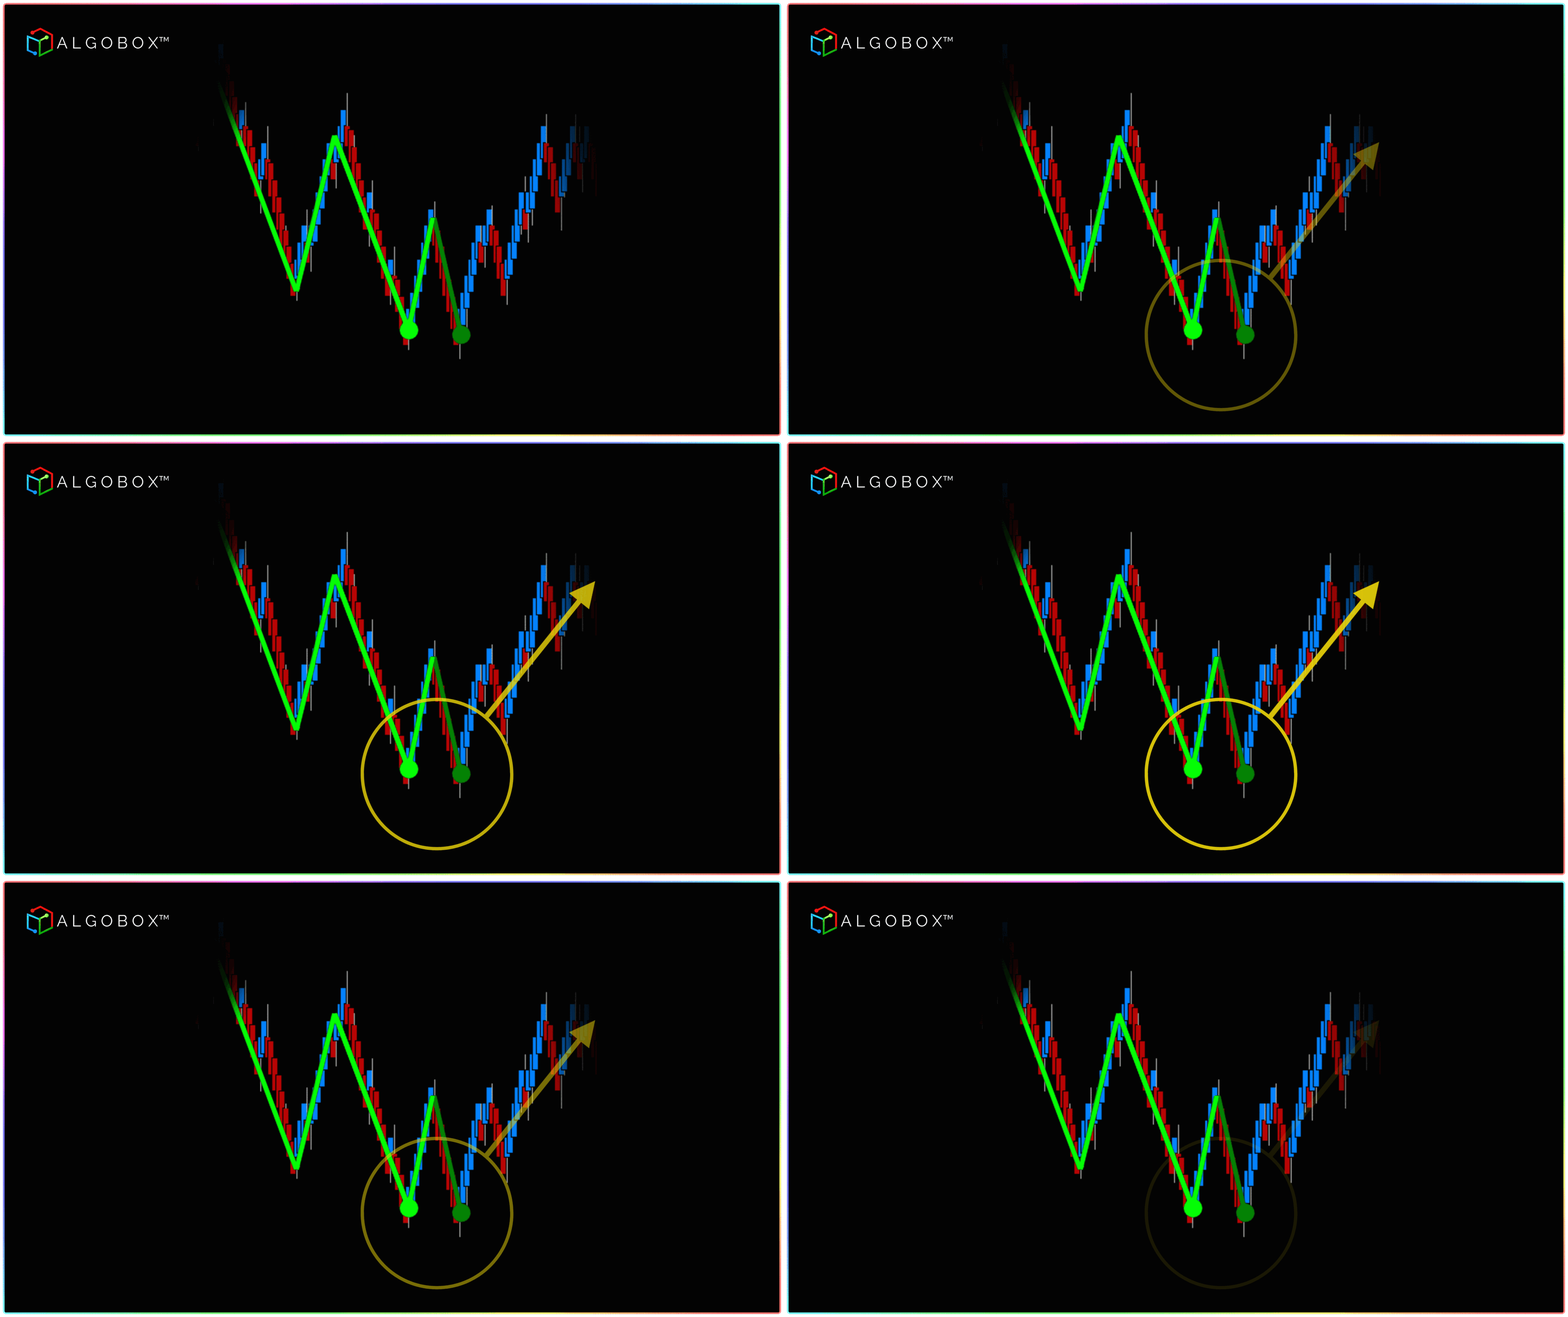
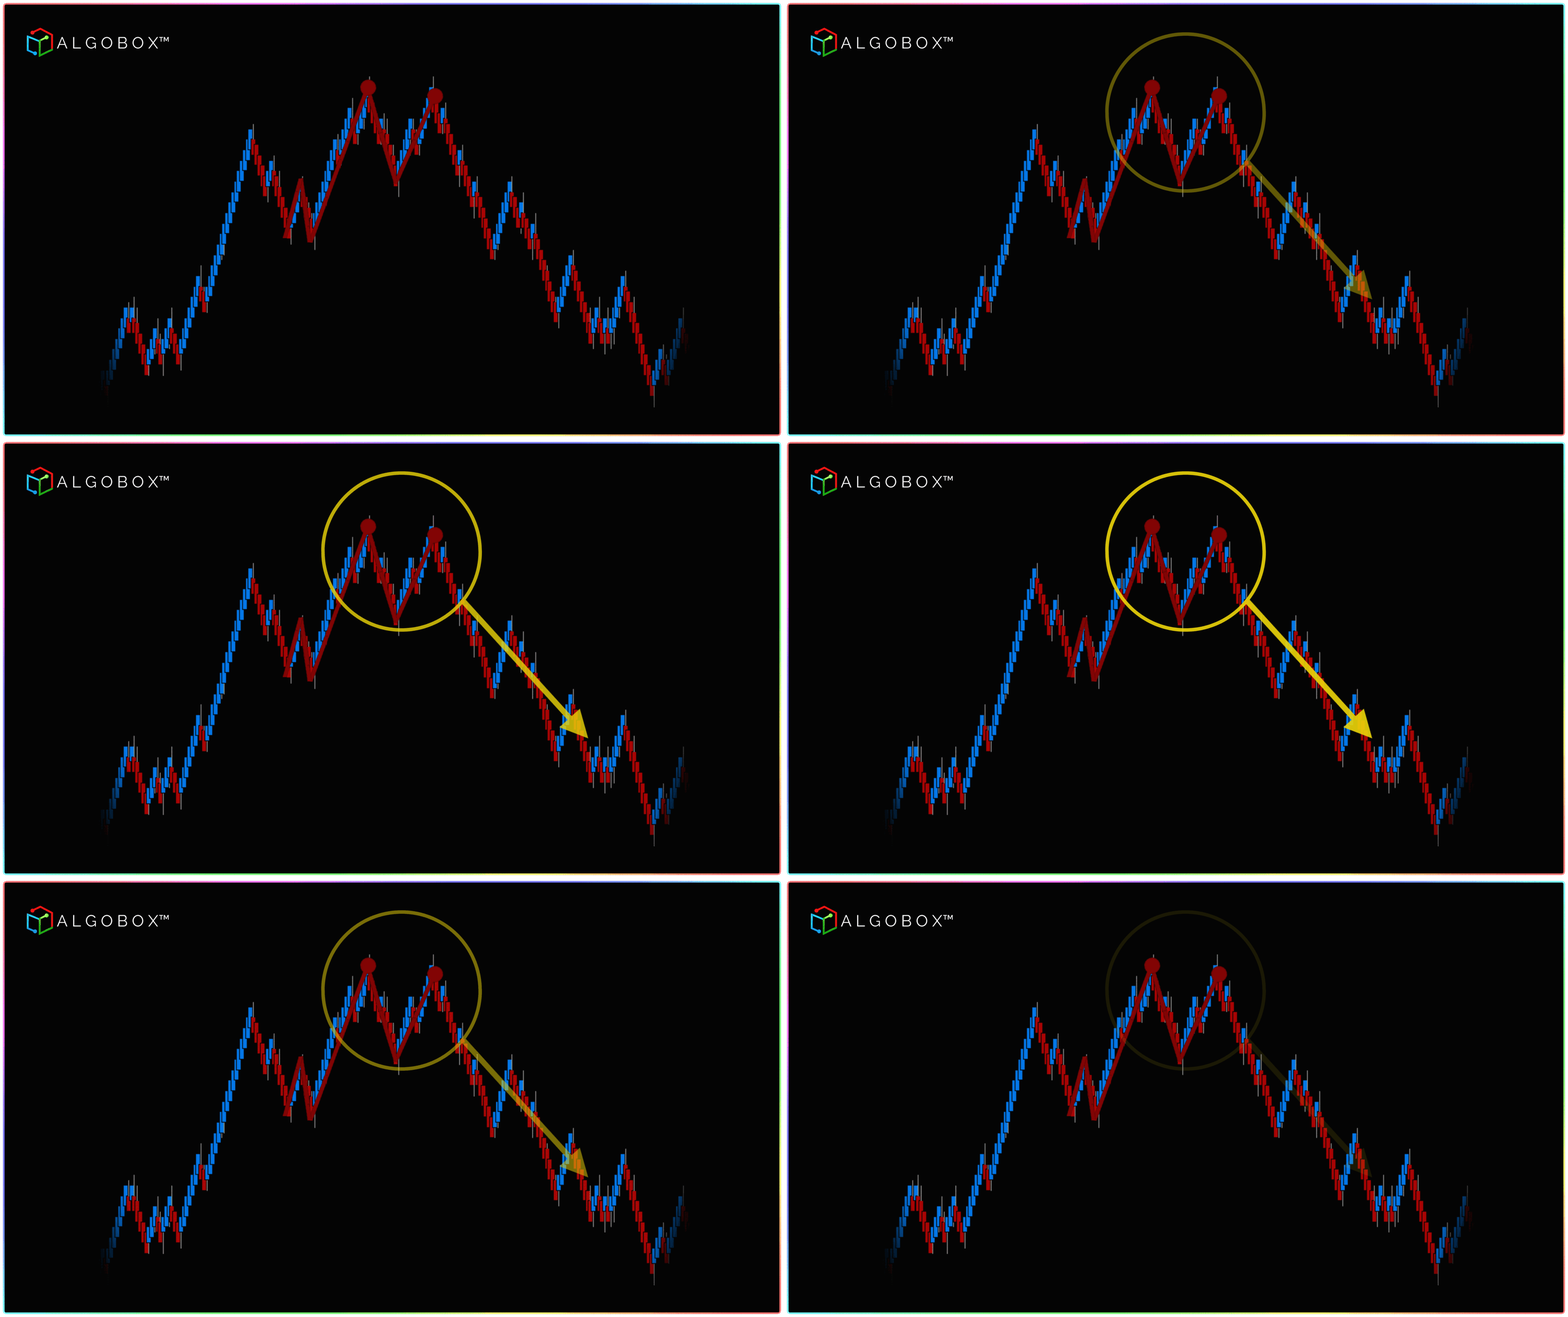
The AlgoBox™ Double Dott strategy consists of two of the same direction appearing closely together up to a maximum of 10 to 15 AlgoBars of each other.

The optimal location for stop loss on a Double Dott setup is behind the latest FibDot.

But What If?

What if the FibDots don't match direction? Our default stance is to consider the latest successful signal.

"Recency is key." -Vinny E. Mini

In most cases, the latest signal could be the guide for direction, but Order of Operations and context is still required at all times in your trading analysis.


Example: Double Dott


Video Tutorials: Double Dott


Extra confluence like and should be considered and can enhance your analysis..

Only available on AlgoBox™ for NinjaTrader 8.

🟢
SMLK Timing
Delta Flagging
Try AlgoBox™ for free today.
Disclaimer
FibElliDotts
WATCH: This short video explains the Double Dott Strategy.
WATCH: Vinny E. Mini talks about the Double Dott strategy (41:00) and so much more in this Mentorship Monday live stream video tutorial.
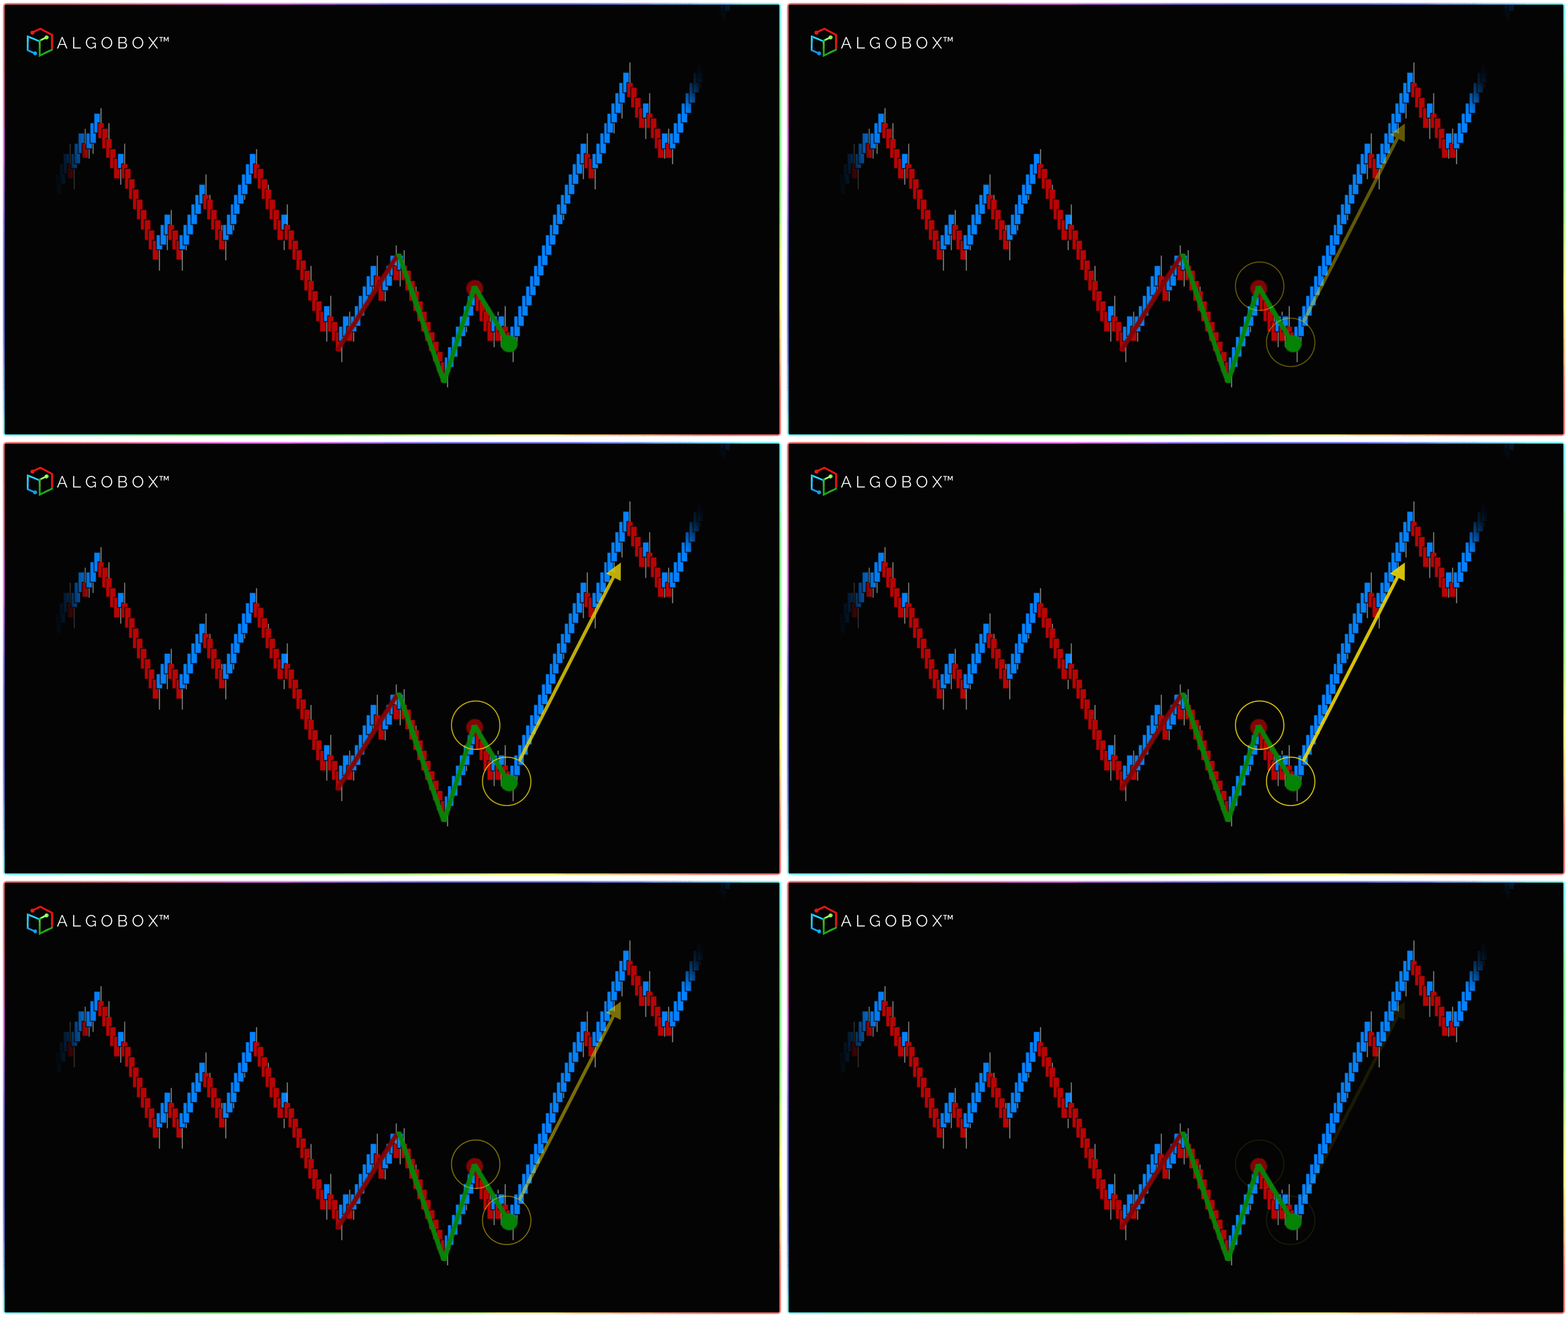
🟢🟢 A bullish Double Dott setup and price reverses to the upside immediately after.
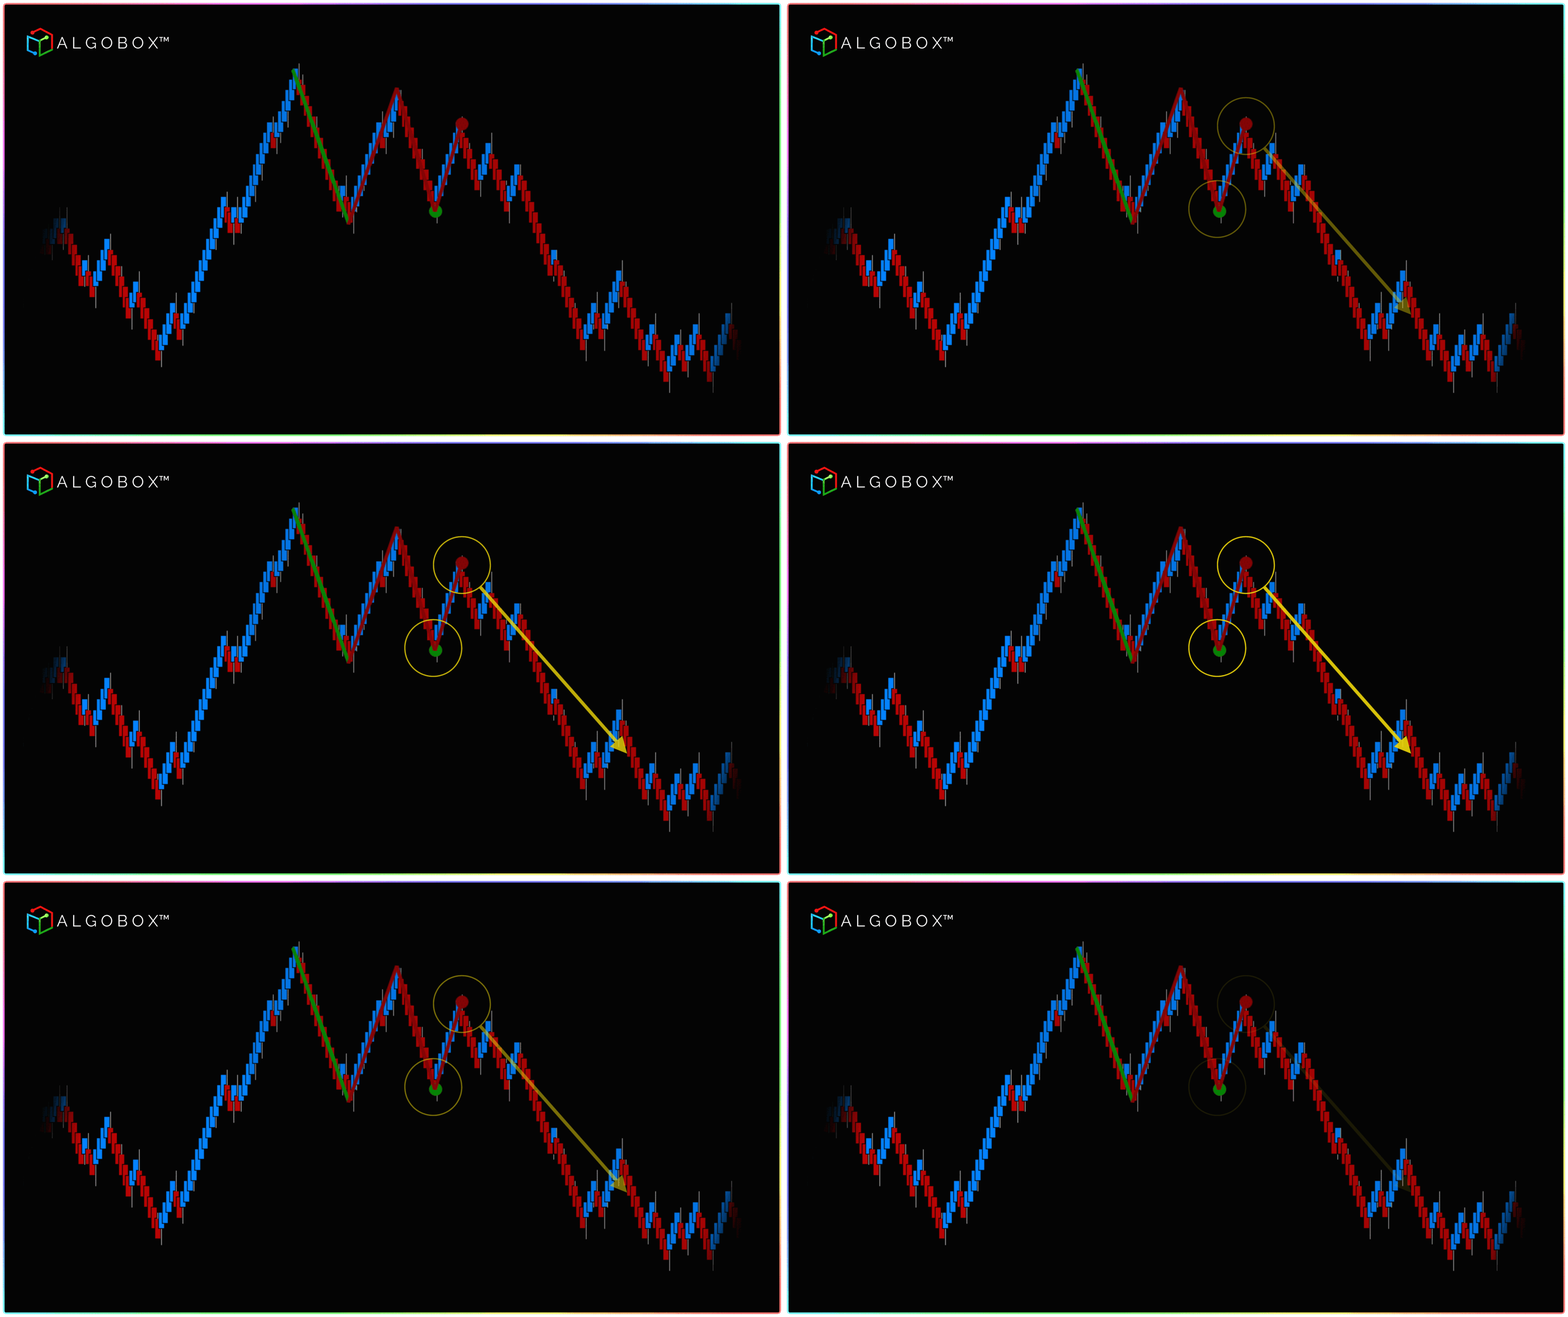
🔴🔴 A bearish Double Dott setup example and price drops immediately after.
In this example of a Double Dott we have a 🟢 bullish FibElliDott followed by a 🔴 bearish FibElliDott, where the price drops immediately after.
In this example of a Double Dot we have a 🔴 bearish FibElliDott followed by a 🟢 bullish FibElliDott, where the price reverses to the upside immediately after.
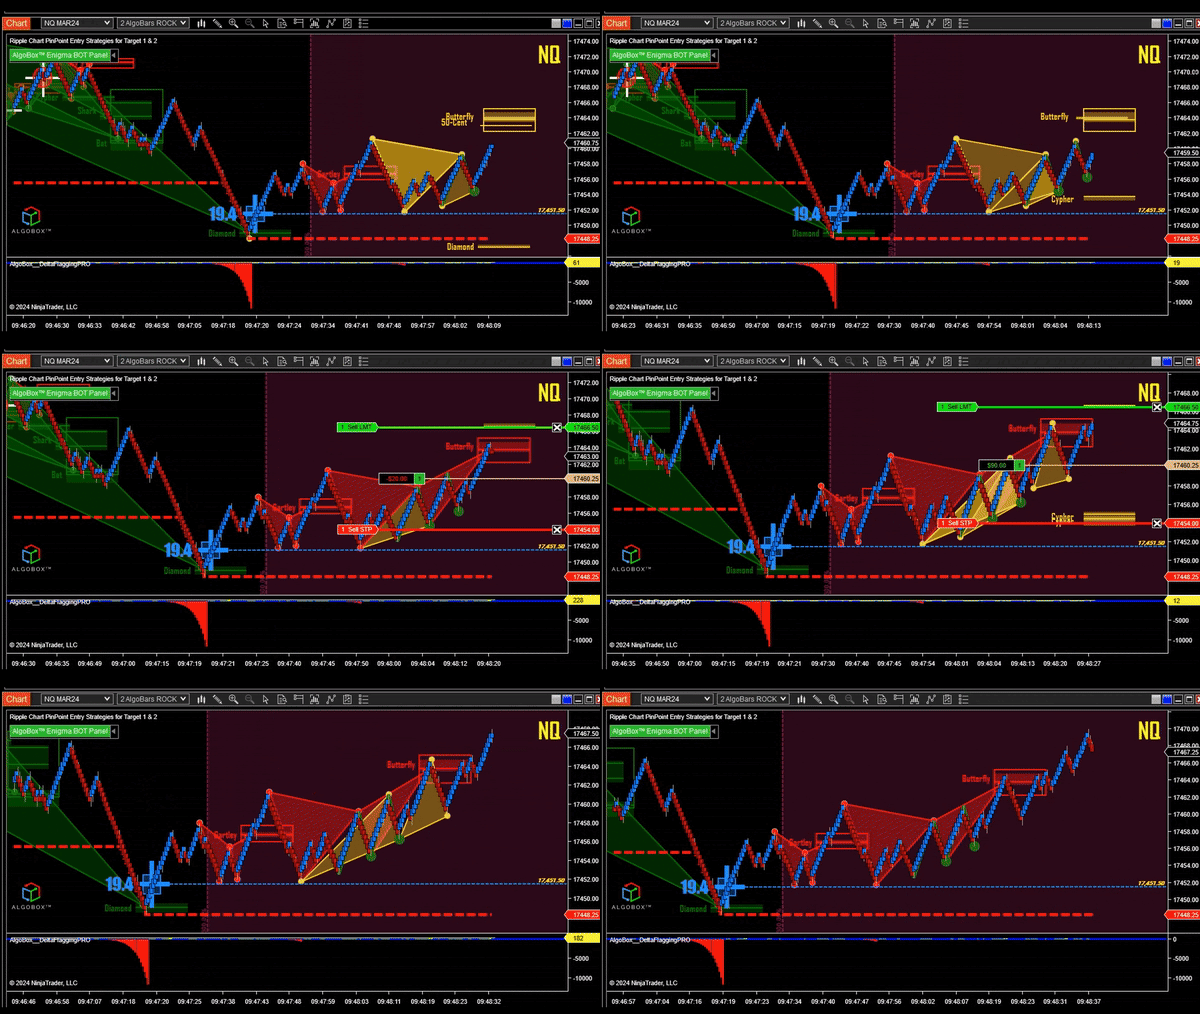
WATCH: A Double Dott long setup appears inside the King Timing zone on NQ futures. This GIF has been sped up 600x for brevity.